MSIX is a Windows app package format that provides a modern packaging experience for all Windows apps. It preserves the functionality of existing app packages and install files while enabling new packaging and deployment features for Win32, WPF, and Windows Forms apps. MSIX provides useful features such as auto-updates, file associations, clean uninstall, and manageability via GPO and PowerShell.
MSIX packages can be published on the Windows Store or on any website using sideloading. In Windows 10 version 20H1, sideloading is enabled by default, making this deployment approach easier for enterprise applications. In this post, I'll use sideloading by publishing the installation files on a static website with GitHub Pages.
#Configuring Visual Studio
First, you need to install the MSIX Packaging Tools component.
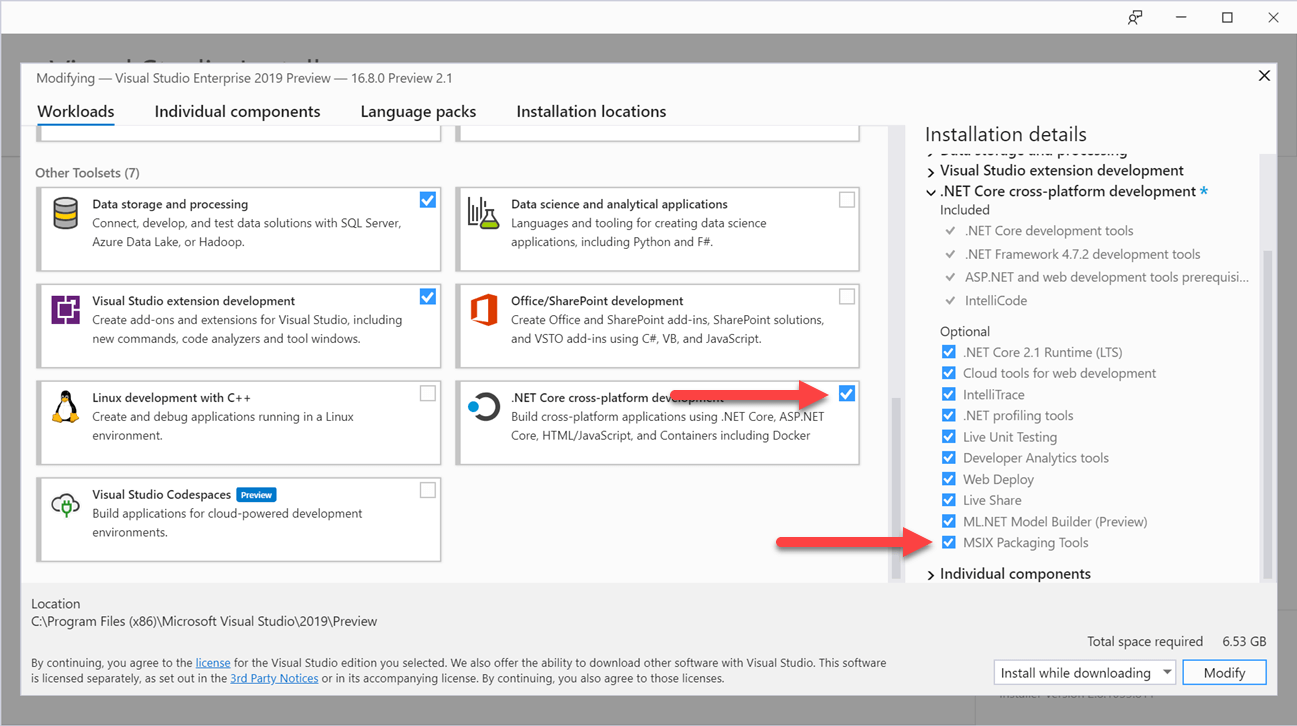
Optionally, you can add the .vsconfig file at the root of your project so Visual Studio will suggest installing this component automatically when the solution is opened:
JSON
{
  "version": "1.0",
  "components": [
    "Microsoft.VisualStudio.ComponentGroup.MSIX.Packaging"
  ]
}
#Solution structure
The solution contains 2 projects:
- A WPF application (.NET Core)
- A Windows Application Packaging Project
The packaging project references the WPF application.
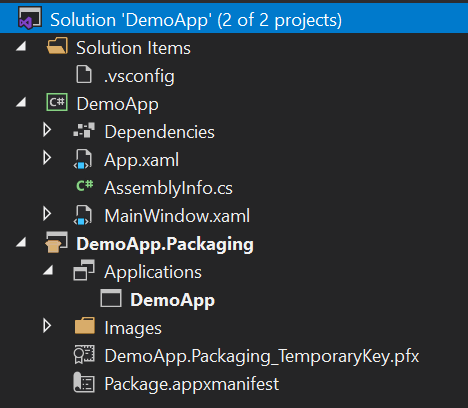
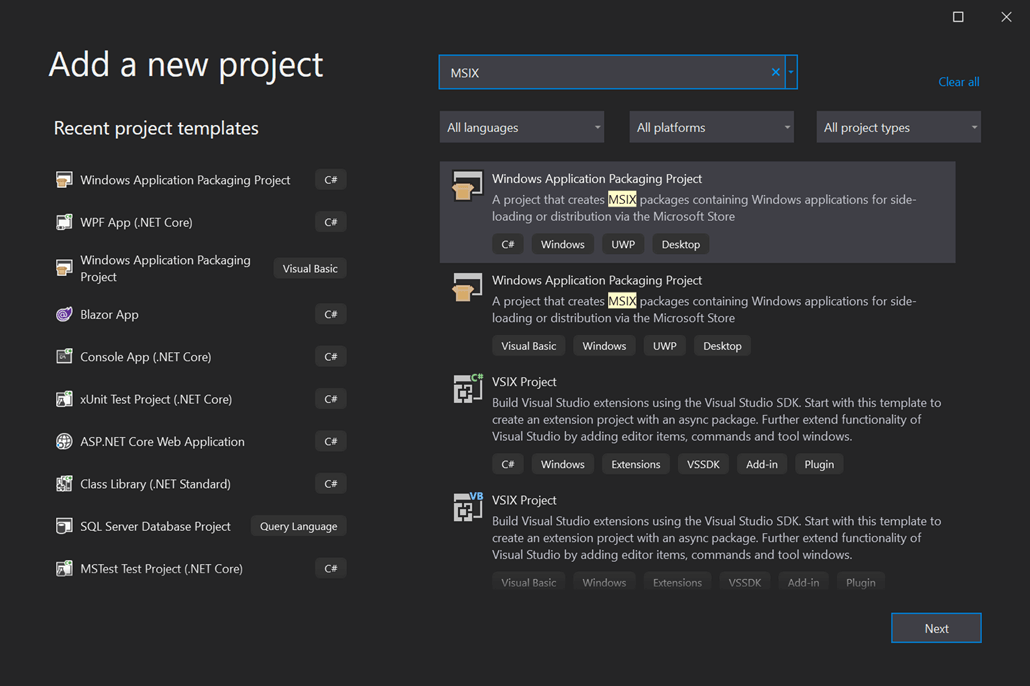
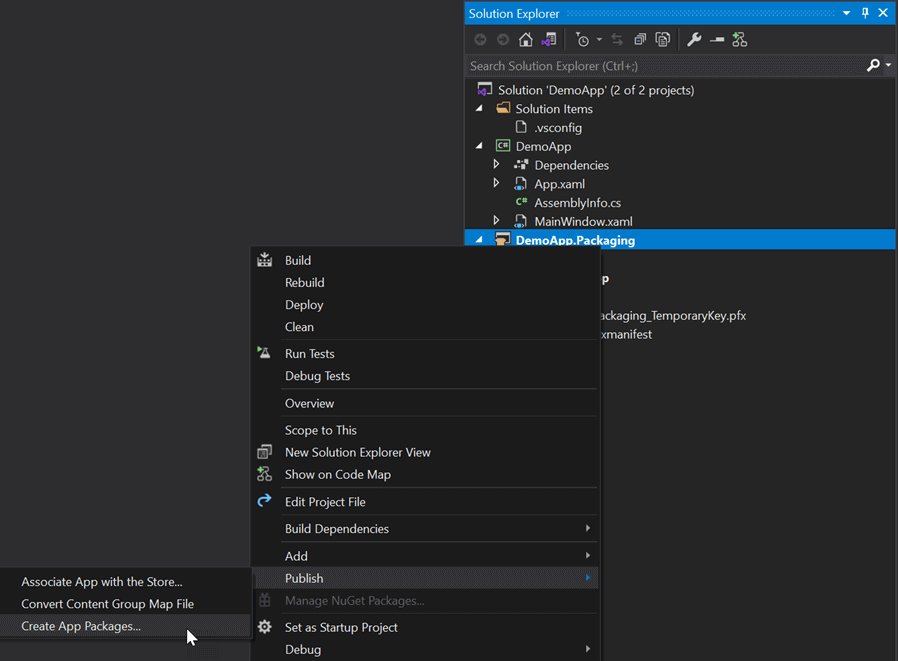
The packaging project is available in Visual Studio once you have installed the optional component:
You can now set the installer project as the startup project and start debugging. It should start the WPF application inside the MSIX container. This way you can debug your application in the same context as when you deploy it!
#Creating the MSIX package
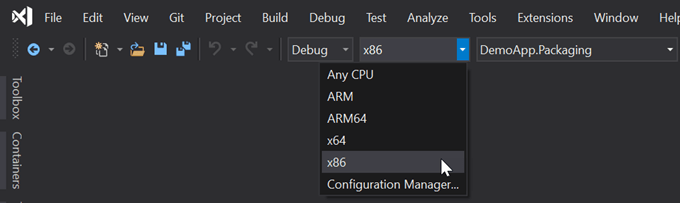
Edit the csproj to target x86 or x64:
csproj (MSBuild project file)
<Project Sdk="Microsoft.NET.Sdk">
<PropertyGroup>
    <OutputType>WinExe</OutputType>
    <TargetFramework>net5.0</TargetFramework>
    <UseWPF>true</UseWPF>
    <RuntimeIdentifiers>win-x86;win-x64</RuntimeIdentifiers>
</PropertyGroup>
</Project>
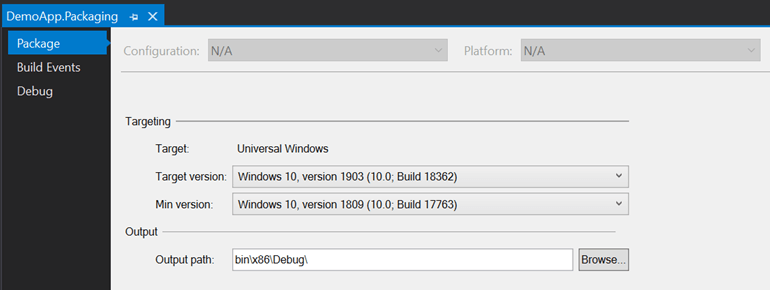
Now make sure you target x86 or x64:
Edit the packaging project properties to set the minimal Windows version supported
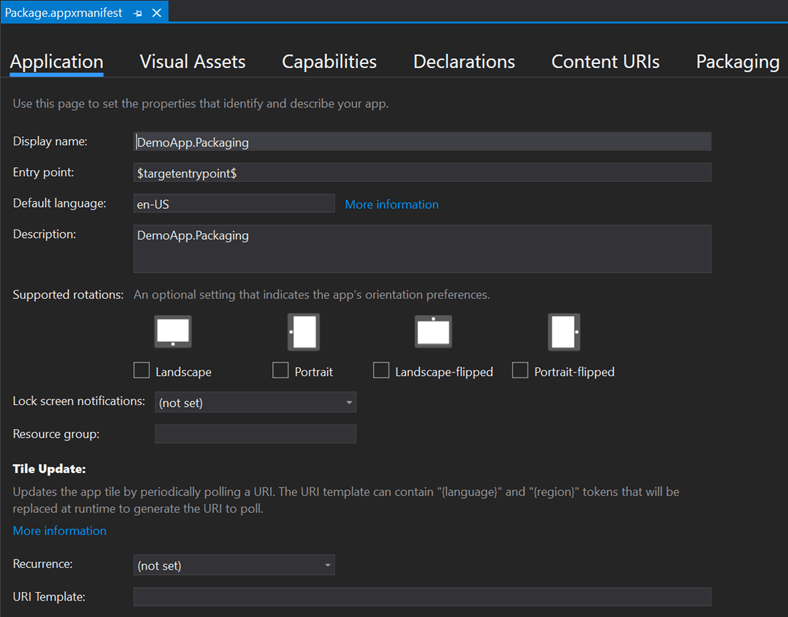
Edit the manifest file (Package.appxmanifest) with the project information: display name, logo, publisher, file associations, etc.
Start the deployment wizard
Select Sideloading mode
Select an existing certificate or create a new one
Select the expected targets
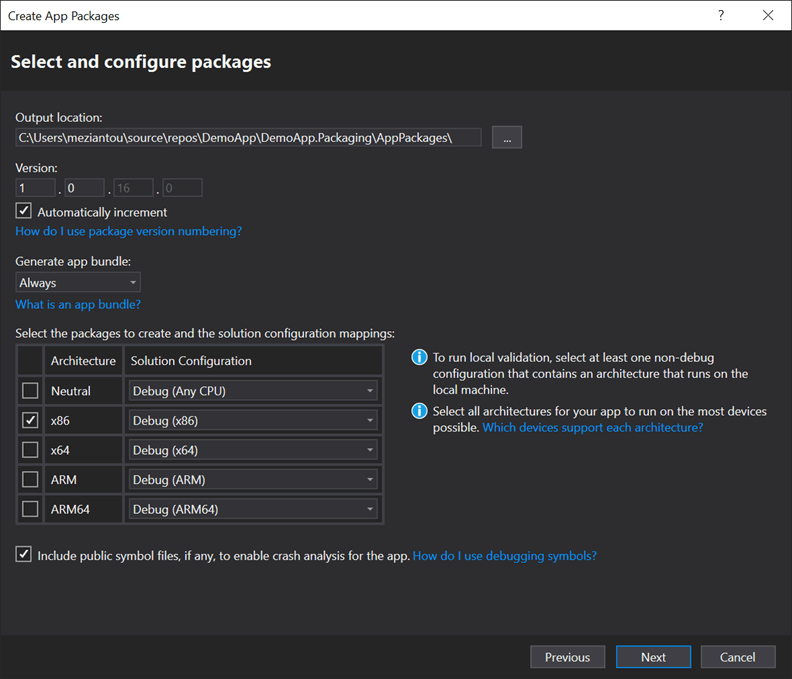
Set the auto-update URL. It is the URL where the generated files will be available. In my case, I use https://meziantou.github.io/msix-demo/. You can use an HTTP server or a shared folder (UNC).
Visual Studio will compile the project and place the generated files in the AppPackages directory:
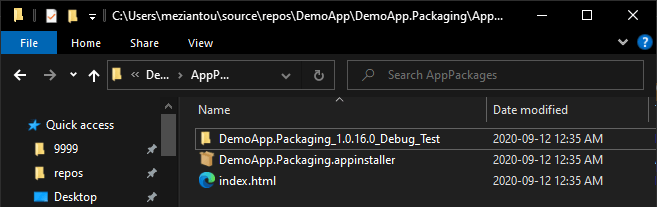
The configuration is saved in the project (.wapproj) and manifest (Package.appxmanifest) files, so building the package from the command line will reuse it.
The App Installer file contains more properties to configure the update behavior of the app. While you cannot set all of them using the packaging project, you can edit the file after building the project.
#Deploying the packages to GitHub pages
There are many ways to deploy the package. The documentation provides many examples such as Azure Web Apps, AWS web service, IIS, Microsoft Intune, GPO, etc. You can also deploy the app to a shared folder (UNC).
In this section, I'll host the files on GitHub Pages because it is free and very easy to set up.
Create a new repository
Push the file at the root of the repository
Enable GitHub pages in the settings
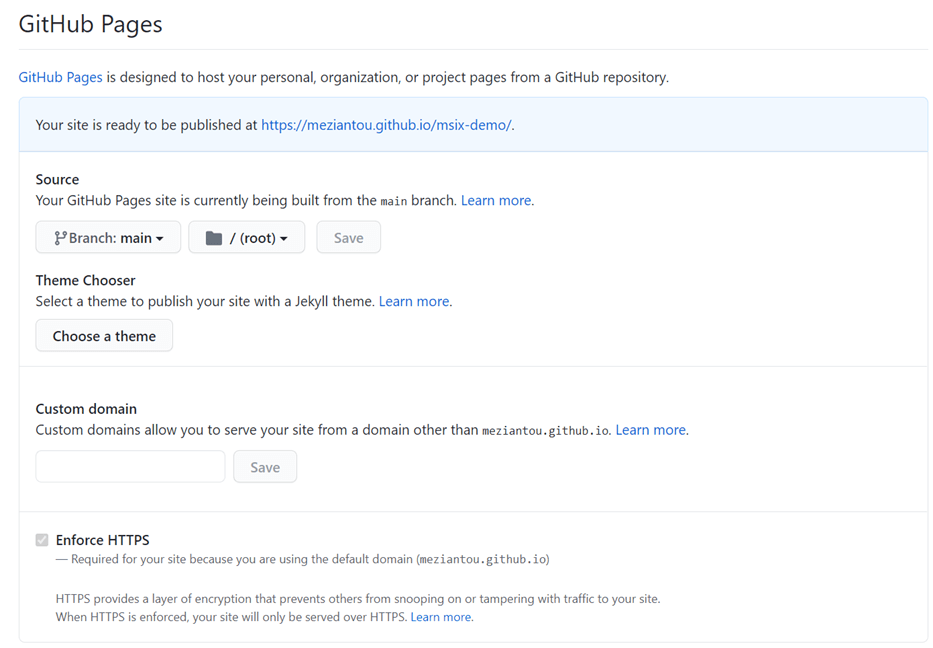
The site is now accessible. The main page displays the application information and has a button to get the application.
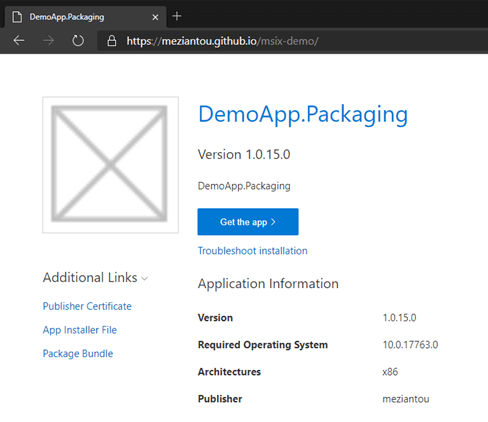
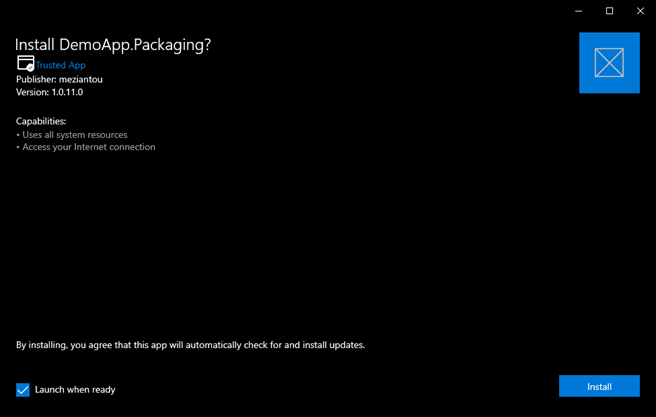
Clicking on the "Get the app" button should open the installer:
#Installing package generated with a self-signed certificate
If you generated the package using a self-signed certificate, you won't be able to install the application. To install it, you first need to trust the certificate.
You can do this manually, or you can use MSIX HERO. This tool is very useful for diagnosing packages and seeing which packages are installed.
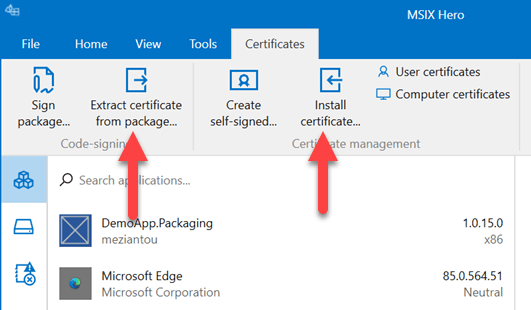
The first option extracts the certificate from the package and installs it. The second option installs it directly from the certificate file. You can get the certificate from the website under "Additional Links".
Once the certificate is installed, you can install the application.
#Check for updates from code
The application will check for updates automatically on startup. If the application runs for a long time, you may also want to check for updates from code to notify the user when a new version is available.
Windows provides an API for working with packages. To use it, you need to target a specific version of Windows. If you are using .NET Core 3.1, you must add the NuGet package Microsoft.Windows.SDK.Contracts (documentation).
csproj (MSBuild project file)
<!-- .NET Core 3.1 -->
<Project Sdk="Microsoft.NET.Sdk">
  <PropertyGroup>
    <OutputType>Exe</OutputType>
    <TargetFramework>netcoreapp3.1</TargetFramework>
    <UseWPF>true</UseWPF>
    <RuntimeIdentifiers>win-x86;win-x64</RuntimeIdentifiers>
  </PropertyGroup>
  <ItemGroup>
    <PackageReference Include="Microsoft.Windows.SDK.Contracts" Version="10.0.17763.1000" />
  </ItemGroup>
</Project>
In .NET 5, you need to change the target framework to set the minimum version of Windows you want to support (documentation):
csproj (MSBuild project file)
<!-- .NET 5 -->
<Project Sdk="Microsoft.NET.Sdk">
  <PropertyGroup>
    <OutputType>WinExe</OutputType>
    <TargetFramework>net5.0-windows10.0.17763.0</TargetFramework>
    <UseWPF>true</UseWPF>
    <RuntimeIdentifiers>win-x86;win-x64</RuntimeIdentifiers>
  </PropertyGroup>
</Project>
You can now use the Windows.ApplicationModel.Package API to get information about the package and check for updates:
C#
var package = Windows.ApplicationModel.Package.Current;
var updateStatus = await package.CheckUpdateAvailabilityAsync();
switch (updateStatus.Availability)
{
    case Windows.ApplicationModel.PackageUpdateAvailability.Unknown:
        MessageBox.Show("Cannot check the status");
        break;
    case Windows.ApplicationModel.PackageUpdateAvailability.NoUpdates:
        MessageBox.Show("The application is up-to-date");
        break;
    case Windows.ApplicationModel.PackageUpdateAvailability.Available:
        MessageBox.Show("A new version is available! Restart the application to install it");
        break;
    case Windows.ApplicationModel.PackageUpdateAvailability.Required:
        MessageBox.Show("A new version is available! Restart the application to install it");
        break;
    case Windows.ApplicationModel.PackageUpdateAvailability.Error:
        MessageBox.Show("Cannot check the status: " + updateStatus.ExtendedError);
        break;
}
You can get the current version of the package using the Package.Current.Id property:
C#
var package = Windows.ApplicationModel.Package.Current;
var version = package.Id.Version;

// Version doesn't override the ToString method, so you need to manually extract each component
var fullName = $"{package.Id.FullName} - {version.Major}.{version.Minor}.{version.Revision}.{version.Build}";

#Deployment using Continuous Integration
First, you need to have the required components installed on the build machine. If you use Chocolatey, you can install the following packages:
Shell
choco install dotnetcore-sdk --version 3.1.402 -y
choco install visualstudio2019-workload-universalbuildtools -y
choco install windows-sdk-10-version-1903-all -y
Then, you need to set the version of the application. The package version is stored in the manifest file. Since this file is XML, you can use a PowerShell script to update it with the new version.
PowerShell
# update-version.ps1
param (
    [string]$version
)

# TODO Set the right file path
$FullPath = Resolve-Path $PSScriptRoot\Package.appxmanifest
Write-Host "Set version '$version' in file '$FullPath'"
[xml]$content = Get-Content $FullPath
$content.Package.Identity.SetAttribute("Version", $version)
$content.Save($FullPath)
You can then call this script:
PowerShell
# TODO use the version from your CI
update-version.ps1 -version $(Build.BuildNumber)
Finally, you can generate the package using msbuild:
msbuild "DemoApp.sln" /t:Restore
msbuild "DemoApp.Packaging\DemoApp.Packaging.wapproj" /p:Configuration=Release;Platform=x86
The command generates the files in the AppPackages folder. You can then deploy them to your server as needed.
#Additional resources
Do you have a question or a suggestion about this post? Contact me!