Google Chrome and Microsoft Edge both provide stores for publishing extensions. Submissions are reviewed to ensure they meet quality standards and behave as described. However, neither store offers a staging environment, and you cannot publish personal extensions restricted to specific users. The solution is to create a private store, which takes some effort but is straightforward. This post describes how to self-host extensions for Chromium-based browsers such as Google Chrome and Microsoft Edge at no cost.
For security reasons, you cannot install extensions from outside the store without manual configuration. The website serving the extension must also use the correct MIME type for the extension file, as browsers require explicit consent before installing extensions that could be harmful.
#Get a domain name
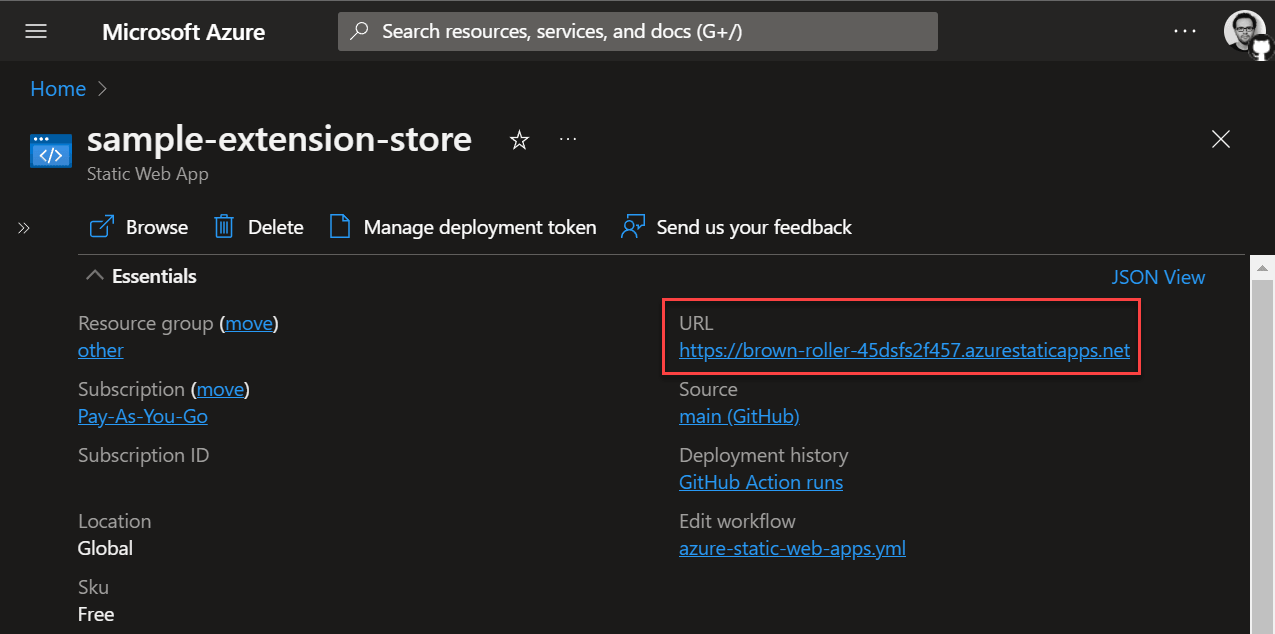
First, you need a domain name, either free or one you own. For this example, I'll use a free Azure Static Web App, which comes with a generated domain such as brown-roller-45dsfs2f457.azurestaticapps.net. It also provides static page hosting, which we'll use to serve the Chromium extension.
Follow this tutorial to create the application and get the domain name: Quickstart: Building your first static site with Azure Static Web Apps
#Deploy the extension
##Repository structure
The repository looks like this:
# GitHub Action file to deploy the website to Azure Static Web App
# This file is generated when you create the App on Azure
.github/workflows/azure-static-web-apps.yml

# Extension source code
src/manifest.json
src/icon.png
src/background.js

sample.extension.pem
The files that are deployed to the website are in the dist folder:
dist/index.html
dist/manisfest.json
dist/extension.crx
dist/staticwebapp.config.json
##Repository content
Create a manifest file src/manifest.json, and replace the update_url with your actual domain:
src/manifest.json (JSON)
{
  "manifest_version": 3,
  "name": "sample-extension",
  "version": "1.0.0",
  "description": "My sample extension",
  "icons": {
    "128": "icon.png"
  },
  "update_url": "https://brown-roller-45dsfs2f457.azurestaticapps.net/manifest.xml",
  "background": {
    "service_worker": "background.js",
    "type": "module"
  }
}
Generate the PEM key to sign the extension. This key preserves the same extension ID across versions, which is required for the browser to automatically update the extension.
Shell
openssl genrsa -out sample-extension.private.pem 2048
openssl pkcs8 -topk8 -nocrypt -in sample-extension.private.pem -out sample-extension.pem
Pack the extension using chrome.exe:
PowerShell
# Paths to "src" and the pem file must be absolute
$src = Resolve-Path src
$pem = Resolve-Path sample-extension.pem
& "${env:ProgramFiles}\Google\Chrome\Application\chrome.exe" --pack-extension=$src --pack-extension-key=$pem
Move the generated crx file to the dist folder:
PowerShell
Move-Item -Path $src\..\src.crx -Destination dist\sample-extension.crx
Extensions can only be installed by clicking a link, so you need a web page with a link to the extension file. Create a file named dist/index.html. It can be a simple page or something more elaborate:
dist/index.html (HTML)
<a href="sample-extension.crx">sample-extension.crx</a>
To allow the browser to automatically update the extension, create a manifest file at dist/manifest.xml. This file contains a list of app entries, each representing an extension. You need to provide the extension ID, the latest version, and a link to the extension file. To find the extension ID, open about://extensions, enable developer mode, and drop the .crx file onto the page. The extension ID will then appear in the list.
dist/manisfest.json (JSON)
<?xml version='1.0' encoding='UTF-8'?>
<gupdate xmlns='http://www.google.com/update2/response' protocol='2.0'>
  <app appid='cclehcjioikemgdocpmhpohbakhmhbbc'>

    <!-- The version attribute represent the latest version available for the extension. -->
    <!-- The browser use this value to auto-update the extension. -->
    <updatecheck codebase='https://brown-roller-45dsfs2f457.azurestaticapps.net/sample-extension.crx'
                  version='1.0.0' />
  </app>
</gupdate>
Chrome requires the extension file to be served with the correct MIME type. Use the staticwebapp.config.json file to configure the MIME type for .crx files in Azure Static Web Apps.
dist/staticwebapp.config.json (JSON)
{
  "mimeTypes": {
    ".crx": "application/x-chrome-extension"
  }
}
You can now deploy the website to Azure Static Web Apps. If you have already created the Azure SWA and linked the GitHub repository, the workflow file and secrets will be configured automatically. You only need to update the app_location property in the workflow file:
.github/workflows/azure-static-web-apps.yml (YAML)
name: Azure Static Web Apps CI/CD
on:
  push:
    branches:
      - main
  pull_request:
    types: [opened, synchronize, reopened, closed]
    branches:
      - main

jobs:
  build_and_deploy_job:
    if: github.event_name == 'push' || (github.event_name == 'pull_request' && github.event.action != 'closed')
    runs-on: ubuntu-latest
    name: Build and Deploy Job
    steps:
      - uses: actions/checkout@v2
        with:
          submodules: true
      - name: Build And Deploy
        id: builddeploy
        uses: Azure/static-web-apps-deploy@v1
        with:
          azure_static_web_apps_api_token: ${{ secrets.AZURE_STATIC_WEB_APPS_API_TOKEN }}
          repo_token: ${{ secrets.GITHUB_TOKEN }}
          action: "upload"
          app_location: "/dist"
          api_location: ""
          output_location: ""
          skip_app_build: true

  close_pull_request_job:
    if: github.event_name == 'pull_request' && github.event.action == 'closed'
    runs-on: ubuntu-latest
    name: Close Pull Request Job
    steps:
      - name: Close Pull Request
        id: closepullrequest
        uses: Azure/static-web-apps-deploy@v1
        with:
          azure_static_web_apps_api_token: ${{ secrets.AZURE_STATIC_WEB_APPS_API_TOKEN }}
          action: "close"
First, you need to configure the local machine to allow extensions from your domain:
Microsoft Edge
PowerShell
New-Item -Path HKLM:\SOFTWARE\Policies\Microsoft\Edge -Name ExtensionInstallSources -Force
New-ItemProperty -Path HKLM:\SOFTWARE\Policies\Microsoft\Edge\ExtensionInstallSources -Name "2" -Value "brown-roller-45dsfs2f457.azurestaticapps.net/*" -Force
New-Item -Path HKLM:\SOFTWARE\Policies\Microsoft\Edge -Name ExtensionInstallAllowlist -Force
New-ItemProperty -Path HKLM:\SOFTWARE\Policies\Microsoft\Edge\ExtensionInstallAllowlist -Name "1" -Value "cclehcjioikemgdocpmhpohbakhmhbbc" -Force
Google Chrome
PowerShell
New-Item -Path HKLM:\SOFTWARE\Policies\Google\Chrome -Name ExtensionInstallSources -Force
New-ItemProperty -Path HKLM:\SOFTWARE\Policies\Google\Chrome\ExtensionInstallSources -Name "2" -Value "brown-roller-45dsfs2f457.azurestaticapps.net/*" -Force
New-Item -Path HKLM:\SOFTWARE\Policies\Google\Chrome -Name ExtensionInstallAllowlist -Force
New-ItemProperty -Path HKLM:\SOFTWARE\Policies\Google\Chrome\ExtensionInstallAllowlist -Name "1" -Value "cclehcjioikemgdocpmhpohbakhmhbbc" -Force
On Linux or macOS, create a JSON file to configure the browser as described in the documentation
Validate the configuration by opening the browser and navigating to about://policy. If the configuration is incorrect, click the "Reload Policies" button.
You can now navigate to the website and install the extension!
You can also install the extension using the ExtensionInstallForcelist registry key. This policy specifies a list of apps and extensions that install silently, without user interaction. Users cannot uninstall or disable this setting, and permissions are granted implicitly.
#Additional resources
Do you have a question or a suggestion about this post? Contact me!